We learned in the last lesson that direct disbursements are great for situations where you don’t actually receive a formal bill and you are simply purchasing something at the store. However, when your church does receive a bill and you don’t end up paying that bill for some time, then it’s probably a better idea to use the billing features within QuickBooks. I’ll show you an example of how to do this today.
Transactions 11 and 12

The dreaded day has come when you open your church’s mail and find a bill from Heaven City Utilities. Here’s what you need to do in QuickBooks.
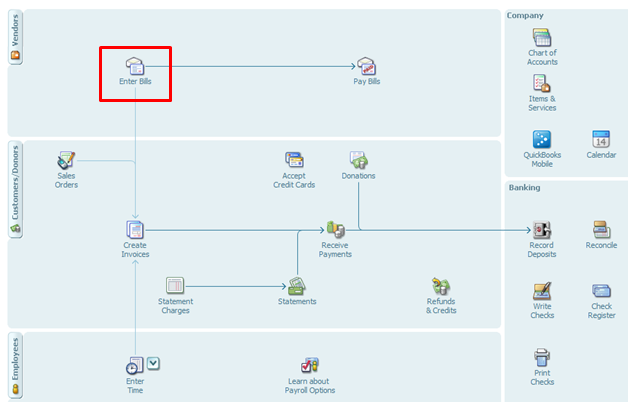
From the home screen click on “Enter Bills”.
Here’s what your screen should look like when you’re done (except for the big stamp that says “Paid” on it). My bill is showing as paid because I’ve already entered the transaction to pay for it (we’ll be entering that transaction a minute).
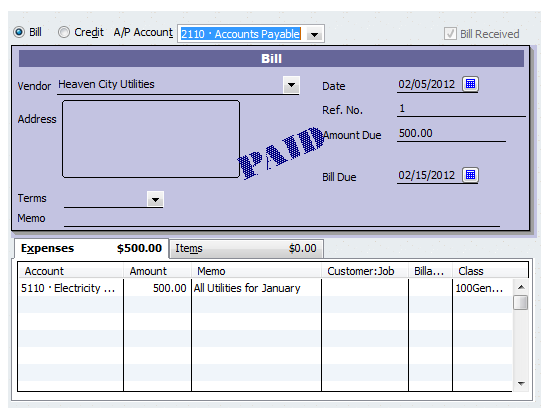
A/P Account: The first thing you’re going to want to do is select the correct accounts payable (AP) account.

Make sure you select the subaccount (this is important in case you want to enter other accounts payable subaccounts in the future). Remember that these subaccounts are useful for keeping track of more detailed information. You can create reports that show the subaccounts or you can create reports that hide the subaccounts and only show the summed up numbers.
Vendor: Click on the dropdown box and then click “Add New”. Add the name and any other information you see fit.
Date: Make sure you have the right date.
Amount: Add in the amount of the bill; $500 in this case.
Bill Due: Enter the date for when the bill is due. The automatic setting is 10 days and that’s what I’ve used in this case.
Account: Choose the correct expense account, pictured below.
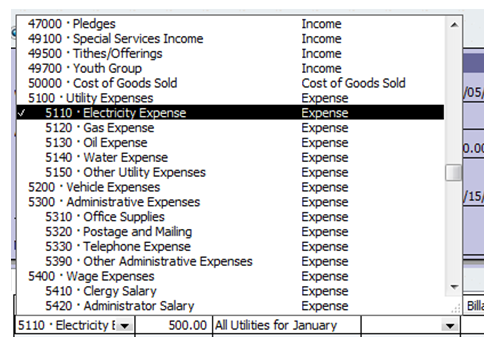
Amount: After you’ve selected the correct expense account, enter the amount.
Memo: Enter a quick memo if you so desire.
Class: For class, select the general fund. Keep in mind that at the end of the month we’ll allocate the utilities to the different programs (administrative, missionary, and youth).
Click “Save & Close” once everything looks right.
A Word on “Reminders”
It can be difficult to remember to pay all of these bills once you enter them into the system. Fortunately QuickBooks has a reminder tool. If you go to Edit >>> Preferences >>> Reminders >>> Company Preferences you’ll see all these reminder options:
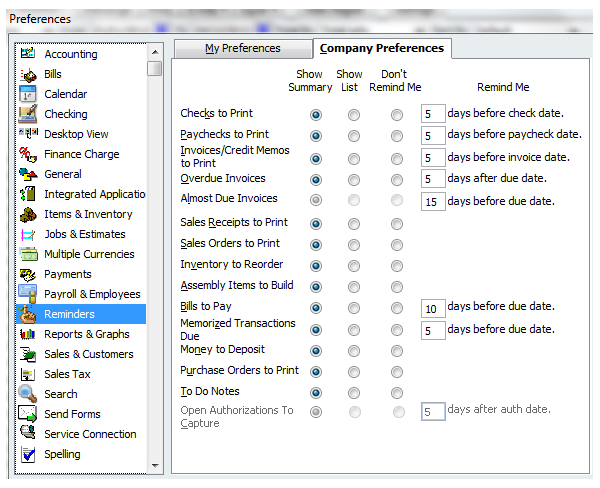
Once you set up your reminders, every time you open QuickBooks a window will show up reminding you of some tasks on your to-do list.
Paying off Bills
So you’ve entered the bill and now the time has come to pay it off.

From the home screen click on “Pay Bills”.
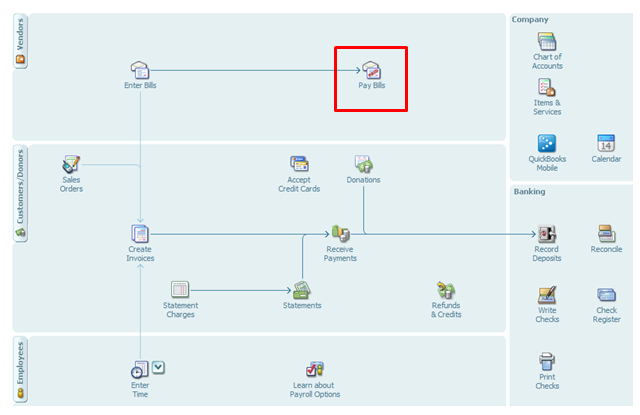
The first thing you’ll need to do once the “Pay Bills” screen opens up is choose the correct accounts payable account. Once you do this, your outstanding bills will be listed (as pictured below).
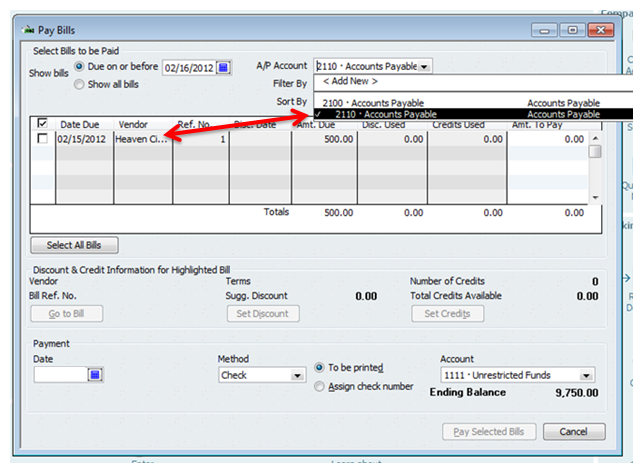
Next, put a checkmark next to the bill that you’re about to pay. Enter in the date that you’ll be paying this bill (2/15/2012).
Choose the Method (check in this case) and then select the appropriate account (we’ll be using the unrestricted funds account). Finally, click “Pay Selected Bills”.

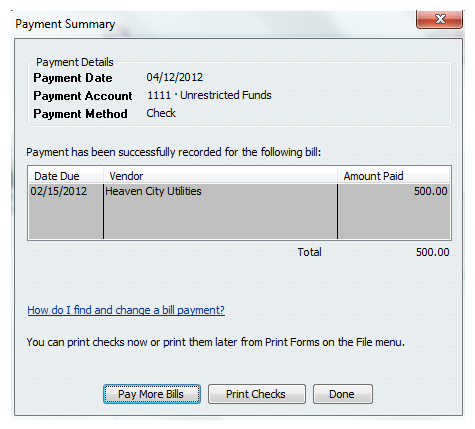
At this point, you should be taken to a screen that tells you that, “payment has successfully been recorded.” This screen also allows you to pay more bills, print the checks, or be done. Click on “Done”.
Let’s take a second to look what happened here behind the scenes. When we created the bill, QuickBooks debited the expense account and credited an accounts payable account (liability account).
When we paid off the bill, QuickBooks debited the liability because it no longer exits. Our cash account (checking) was credited.
Conclusion
Today we learned how to enter bills into QuickBooks and how to pay those bills off. After doing all this you should know how to make most of the expense entries you’ll need at your church. Just for practice in the next lesson we’ll do some more expense entries.

